An understanding of aperture, one of the most basic elements of photography, is essential to getting the exact result you desire of your nighttime cityscapes.
To start off with the basics, aperture is the opening, or gap in the lens. For most cameras, you will never see the blades that control aperture, but in the back element of your lens, in front of the sensor is a series of blades, often 7 that form a circle or hole. As you change the aperture setting on your camera, these blades will extend and retract. By doing so the size of the opening increases and decreases allowing more or less light to come in. The size of the hole or aperture is represented by f-stops. It may seem backwards, but a high f-number such as f/22 means that the hole is very narrow and a low f-number such as f/3 means the hole is very wide. This is how aperture affects the exposure and is why it is usually mentioned along with shutter speed and ISO.
Besides it's key purpose, allowing you to alter the amount of light getting to the sensor or film, adjusting the aperture can give you interesting affects. Using a wide aperture or a high f-stop, will allow you to achieve a greater depth of field. This means that if you are focusing on a subject very close to you, you will also have the background in focus. On the other hand, if you use a narrow aperture, you will get a shallow depth of field, allowing you to blur the background while focusing on a subject close to your camera. This might not sound favorable, but for macro shots, it is often desirable. What does this mean for your nighttime city skyline shots? If you have a tripod and can use a long shutter speed, you should try to use a high f-stop as long as you can still get the correct exposure.
Finally, a little tip about aperture that I discovered just by experimenting and taking photos. Unlike the other ways aperture can affect your photo, this ONLY applies for nighttime photography where you have dark areas in your scene, but also bright lights from a city. Examine the two pictures below of the Cincinnati Skyline.
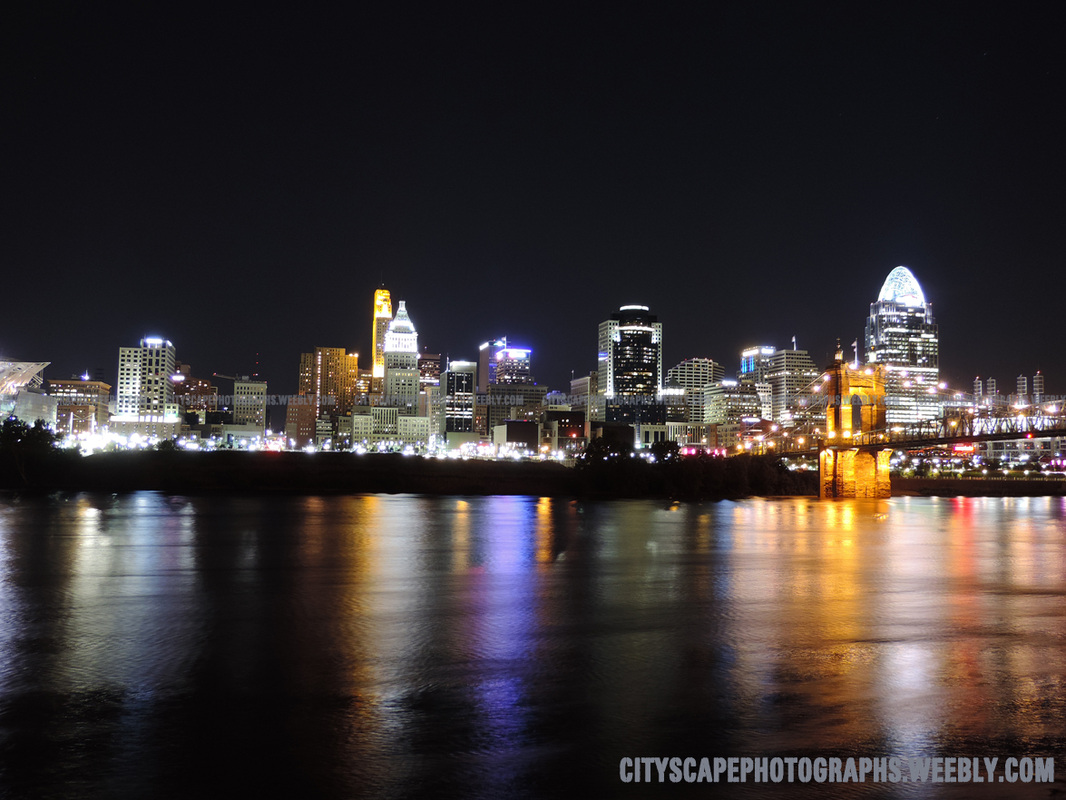
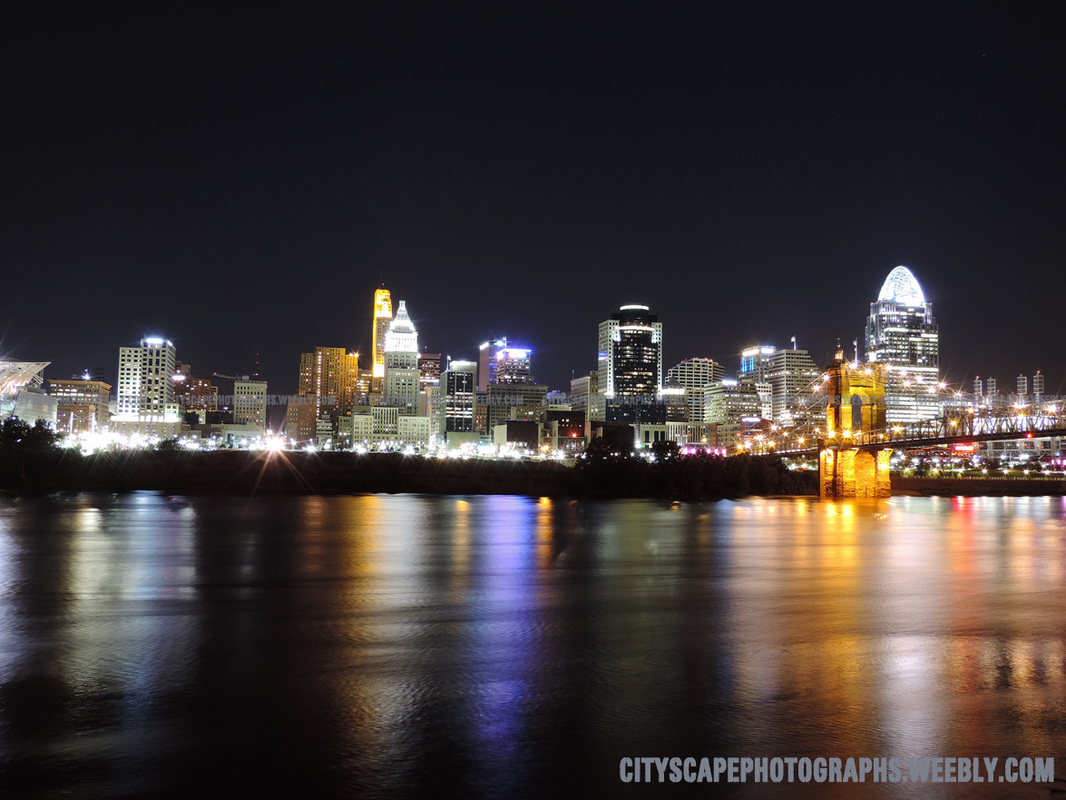
The first image was shot with a small f-stop and the second one was taken with a larger f-stop. Can you notice the difference? In the first picture, the lights from the bridge and streets appear to be rounded, but in the second image, the lights appear to be star shaped and are a bit bigger. I've tried this experiment at many different times and it always holds true!
I hope you enjoyed this post! Keep visiting this site as more content is added. Share your knowledge about aperture in the comments section and let us know if you prefer a wide or narrow aperture!
I hope you enjoyed this post! Keep visiting this site as more content is added. Share your knowledge about aperture in the comments section and let us know if you prefer a wide or narrow aperture!
 RSS Feed